A Comprehensive Guide: How To Install A Ceramic Tile Mural In Your Home
Introduction
Ceramic tile murals are a unique and visually stunning way to elevate the décor of your home. Not only do they add a distinct aesthetic appeal to your living space, but they also bring a touch of personal creativity and artistic flair. These beautiful pieces of art vary in design, size, and style - offering an endless array of possibilities to compliment any interior. This step-by-step guide aims to provide a comprehensive understanding of how to install your very own ceramic tile mural at home, transforming your ordinary wall into an extraordinary focal point.
What is a ceramic tile mural?
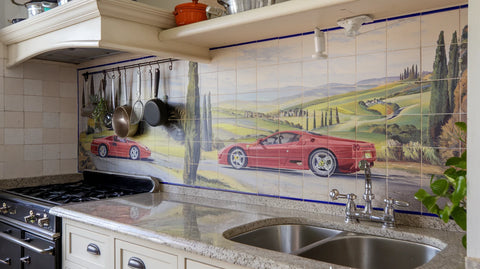
Ceramic tile murals are essentially a collection of individual ceramic tiles that come together to form a larger image or design. The mural can be as simple as a geometric pattern or as intricate as a detailed landscape or portrait. The specialty of the These murals are not just aesthetic enhancements; they're a practical choice. They're durable, easy to maintain, and resistant to moisture and heat, making them suitable for various rooms in your home, from the kitchen to the bathroom and even the patio.
What's the benefits of Ceramic tile mural?
The benefits of installing a ceramic tile mural in your home extend beyond mere aesthetics. They also add value to your property. Due to their durability and the artistic value they bring, ceramic tile murals can be an attractive feature for potential home buyers. Moreover, they are a great way to reflect your personal style and creativity, making your home truly feel like your own.
How-to choose a design for tile mural?
Choosing a design for a ceramic tile mural involves an exciting exploration of options. From abstract designs, landscapes, geometric patterns, to replicated famous artworks, your choices are endless. When selecting a ceramic tile mural, several factors should be taken into account, including the room's existing decor, the wall space available, and your personal taste and lifestyle. The right design can make your mural a conversation piece, a serene sanctuary, or an energizing backdrop to your everyday life.
Before the exciting process of installation begins, preparing the wall is an essential step. This involves clearing the area, removing any existing tiles or wallpaper, repairing damaged areas, cleaning the wall, checking for levelness, and applying primer if needed. Each of these steps ensures that the wall is in the best possible condition to receive the ceramic tile mural, paving the way for a successful, stunning installation.
This guide provides you with detailed, step-by-step instructions on how to install a ceramic tile mural in your home. Whether you are an experienced DIY enthusiast or a beginner looking to take on a new project, this guide will provide you with the knowledge and confidence to successfully install a ceramic tile mural and add a touch of art and elegance to your home.
Choosing a Design
Choosing the perfect ceramic tile mural design for your home is a significant step in the installation process. This decision involves choosing a design that not only resonates with your personal style and enhances your home's aesthetic appeal, but also complements the existing decor and color scheme in the space where it will be installed. There are numerous ceramic mural designs available in the market, offering a wide array of options in color, pattern, and style. Ranging from abstract geometric patterns to intricate nature-inspired designs, and from vibrant, colorful murals to subtly toned, elegant pieces, there is a ceramic tile mural for every taste and style.
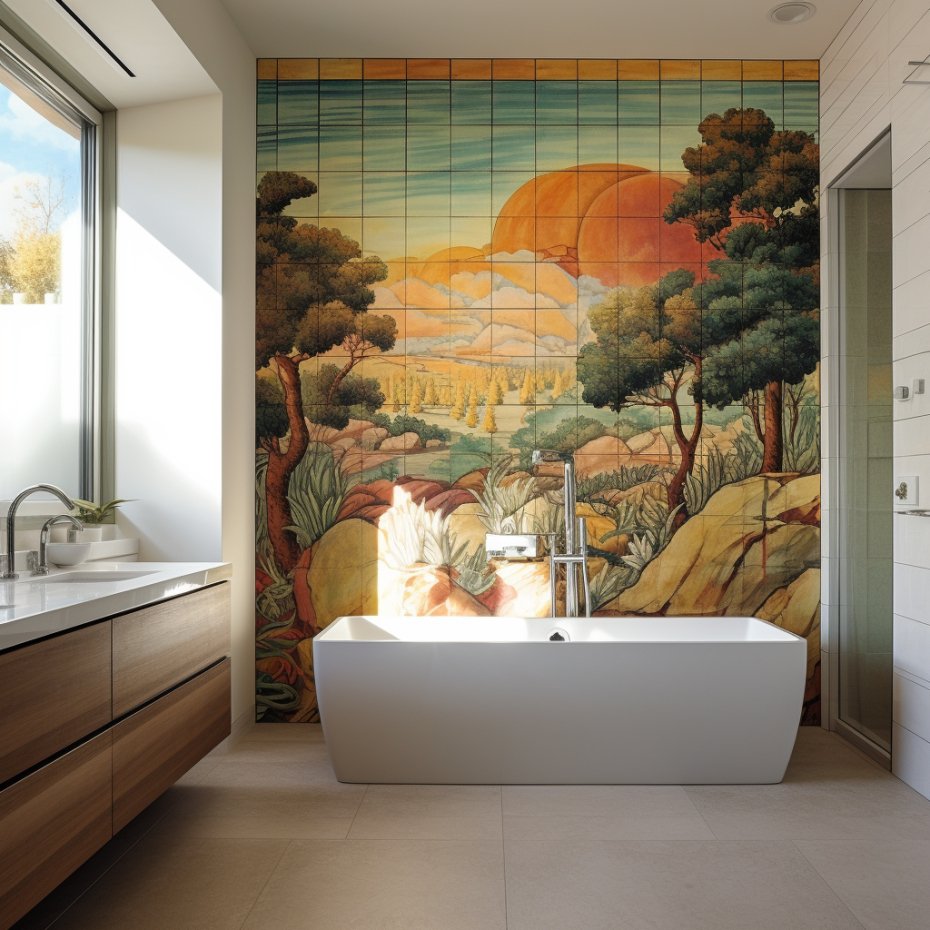
One of the first factors to consider when selecting a ceramic tile mural is the size and scale of the mural in relation to the area where it will be installed. Consider the dimensions of the wall or space where the mural will be mounted. A large, expansive wall may accommodate a grand, intricate mural, while a smaller wall or specific area like a backsplash might call for a simpler, more compact design. It's essential to strike a balance, ensuring that the mural does not overwhelm or underwhelm the space.
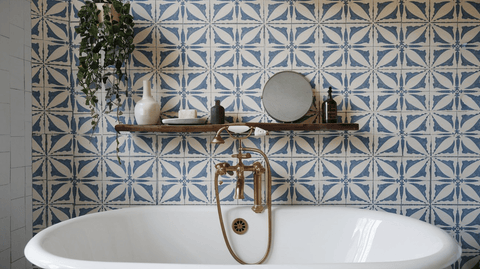
The room's function and ambiance are also important considerations when selecting a design. For instance, if the mural is for a kitchen or dining area, you may want to choose a design that instills a warm, inviting atmosphere. Conversely, for a bathroom or spa area, you might opt for a calming, nature-inspired design. Additionally, certain designs might be more suited to high-traffic areas, given their durability and ease of maintenance.
Another vital aspect to consider is the color scheme of the mural. It should ideally blend in seamlessly with the room's existing color palette, enhancing its visual appeal. However, if you're seeking a more dramatic effect, you might select a mural with contrasting colors to create a striking focal point within the room. The choice of colors can significantly influence the room's mood and energy, so it's worth spending some time on this aspect.
Finally, it's important to consider the overall style of your home's interior. If your home features a traditional design, a classic, timeless ceramic tile mural might be the best fit. Alternatively, if your home has a modern or contemporary design, you might lean towards a more abstract or minimalist mural. Remember, the mural should not only serve as a stunning piece of artwork but also as a cohesive element that ties together the overall design theme of your home.
In conclusion, choosing a ceramic tile mural design involves careful consideration of various factors such as the mural's size, the room's function, the color scheme, and the style of your home. By taking the time to evaluate these aspects, you can select a mural design that enhances your home's aesthetic appeal and serves as a stunning focal point for years to come.
Preparing the Wall
Before beginning the process of installing your new ceramic tile mural, it's crucial to prepare the wall adequately. This preliminary phase is integral to achieving a smooth, professional-looking result. Ensuring your wall is clean, level, and primed for tile installation will make the subsequent steps of this process much easier.

Start by clearing the area. Relocate any furniture, decorations, or other items from the wall and surrounding area. This will provide you with a clear and open space, minimizing the risk of damage to your possessions. Additionally, to protect your floors from dust and debris, cover them with drop cloths or plastic sheets. This protective measure will make cleanup after installation significantly easier.
Next, you need to remove any existing wall coverings. If tiles are currently fitted, use a screwdriver or drill to remove any screws or nails holding them in place. Should your wall be adorned with wallpaper, use a putty knife to gently scrape it off. It's important to proceed with caution here; avoid causing damage to the wall surface that could make the installation of your new mural more challenging.
Once the wall surface is bare, carefully inspect it for any signs of damage, such as cracks, holes, or other imperfections. These areas should be filled with a spackling compound or joint compound using a putty knife. Allow the compound to dry according to the manufacturer's instructions. When it's dry, sand it smooth using medium and fine-grit sandpaper. This will ensure a flat and uniform surface, facilitating a more successful mural installation.
Subsequent to this, it's time to clean the wall. Create a mixture of a cleaner or a mild detergent with water in a bucket, following the manufacturer's instructions. Soak a sponge or rag in this solution, and thoroughly clean the wall surface. This step will remove any dirt, grease, or other contaminants that could interfere with the installation of your new ceramic tile mural. Rinail with clean water and let the wall dry completely before moving forward.
Lastly, evaluate the levelness of your wall. Using a level, check if the wall is plumb and level. If there are any uneven areas, use a hammer to gently tap them until they are aligned. Some walls may also require a primer to improve the adhesion of your new tiles. If this is the case, apply the primer according to the manufacturer's instructions, and allow it to dry fully before proceeding.
Preparing your wall carefully and meticulously will set the tone for a successful installation of your ceramic tile mural. By ensuring your wall is clean, level, and primed, you are laying a solid foundation for your new masterpiece.
Installing the Tiles
The process of installing the tiles is a crucial step in creating your ceramic tile mural. Each action in this stage, from the choice of adhesive to the positioning of the tiles, will determine the overall look and longevity of your mural. Let's delve into the step-by-step process to ensure a successful installation.

Firstly, you need to select the right adhesive for your ceramic tiles. There are various types available, with thin-set mortar and tile adhesive being the most commonly used. Thin-set mortar is a combination of cement, fine sand, and a water-retaining agent, making it a strong, lasting option. Tile adhesive, on the other hand, is a ready-to-use product available in large containers. Both types have their pros and cons, and your choice will depend on factors like the nature of your wall surface, the size and weight of your tiles, and the conditions of the room.
Once your adhesive is ready, it's time to apply it to the wall. Start by using a notched trowel to spread the adhesive onto the wall. Hold the trowel at a 45-degree angle to the wall and apply the adhesive in even, horizontal strokes. It's essential to work in small sections to prevent the adhesive from drying before you have a chance to position the tiles.
Next, you need to position your tiles. Press each tile firmly into the adhesive, ensuring each piece is well-seated and evenly spaced. Tile spacers can be used to maintain consistent gaps between the tiles, which are necessary for the grouting process later. Use a level to confirm that the tiles are straight and aligned. Continue laying tiles in this manner until the entire mural is in place. After this, you will need to let the adhesive dry as per the manufacturer's instructions.
Once the adhesive has fully dried, it's time for grouting. Grouting is the process of filling the spaces between your tiles to provide a seamless and professional finish. Start by removing the tile spacers. Then mix the grout according to the manufacturer's instructions. Apply the grout with a grout float, ensuring it fills all gaps evenly. Wipe off any excess grout with a damp sponge or rag and remember to allow the grout to dry for the recommended time.
Lastly, you may choose to seal the grout. This is an optional step but highly recommended as it protects the grout from stains and moisture, ensuring the longevity of your mural. Apply the grout sealer as per the manufacturer's instructions.
In conclusion, the installation process of your ceramic tile mural may seem intricate, but with patience and precision, you'll create a stunning feature in your home that is worth the effort.
Finishing Touches
Congratulations on successfully installing your ceramic mural tile! This is a significant achievement that transforms your living space and adds an aesthetic appeal. However, the job isn't done just yet. Now, the crucial part is to add the finishing touches to ensure that your tile looks polished and professional. This includes cleaning, examination, sealing, and polishing the tile surface. Each of these steps is crucial to maintaining the longevity and beauty of your ceramic tile mural.
Start off by cleaning the tile surface. Begin by wiping down the entire surface of the ceramic mural tile with a damp cloth or sponge. This will help remove any dust, dirt, or grime that may have accumulated during the installation process. Ensure that you're thorough in this step, as any remaining contaminants could affect the final finish of your mural. Once you have thoroughly cleaned the tile surface, allow the tile to dry completely before proceeding.
The next step is to inspect for any imperfections. Carefully examine each tile for any visible imperfections such as uneven grout lines, chipped edges, or excess adhesive. If you notice any issues, address them before moving forward. Use a grout scraper or utility knife to remove any excess adhesive or grout, and touch up any chipped edges with a matching ceramic paint or touch-up kit. This attention to detail will ensure a clean and professional finish.
Now that your tiles are clean and free from defects, it's time to seal the grout. This is a crucial step to ensure the longevity of your mural as it protects the grout from stains, moisture, and discoloration. Choose a high-quality grout sealer that is suitable for ceramic tiles. Follow the manufacturer's instructions for application, which typically involves using a small brush or roller to evenly coat the grout lines, taking care to avoid the tiles themselves. Allow the sealer to dry completely according to the manufacturer's instructions.
Once the grout sealer has dried, consider applying a tile and grout cleaner to maintain the vibrancy of your mural. Choose a cleaner specifically designed for ceramic surfaces to ensure it doesn't damage your tiles. Follow the instructions on the cleaner's packaging, usually involving spraying the cleaner onto the tile surface and scrubbing gently with a soft brush or sponge. Rinse thoroughly with clean water and allow the tile to dry completely.
Finally, if you desire a glossy finish, you can polish your ceramic mural tile. Using a ceramic tile polish or wax, apply a small amount onto a clean, soft cloth and gently buff the tile surface in circular motions. This will enhance the shine of your tiles and provide an extra layer of protection. Be sure to follow the manufacturer's instructions for the specific product you are using. Allow the polish to dry completely before touching or walking on the tile.
In conclusion, the finishing touches are as crucial as the installation process itself. By following these steps, you can ensure your ceramic tile mural looks polished, professional, and stunningly beautiful. It's now time to sit back and admire your handiwork.
Maintenance
Maintaining a ceramic tile mural is a straightforward process, but it does require care and attention to ensure its longevity and continued aesthetic appeal. Regular cleaning, stain removal, and occasional sealing are all part of the maintenance schedule to preserve the beauty and integrity of your mural.
Firstly, it's important to perform regular cleaning. Start this process by removing any loose dirt or debris from the mural's surface with a vacuum cleaner equipped with a soft brush attachment. Next, prepare a cleaning solution by mixing warm water with a mild, non-abrasive detergent or a ceramic tile cleaner. Avoid using harsh chemicals or abrasive cleaners, as these can damage the tile. Use a soft sponge or cloth to gently scrub the tile surface in a circular motion, paying particular attention to stained or dirty areas. Rinse the tile thoroughly with clean water to remove any soap residue and then dry it with a soft, lint-free cloth or allow it to air dry.
In the case of stubborn stains, a mixture of baking soda and water can be used to create a paste. Apply this paste to the stained area and let it sit for a few minutes before gently scrubbing. Always use a soft brush or sponge to prevent scratching the tile's surface. Afterward, rinse the tile and dry it thoroughly.
Sealing is another important part of maintaining your ceramic tile mural. Depending on the type of your mural, it may require periodic sealing to prevent stains and moisture damage. Before applying the sealer, ensure the tile surface is clean and thoroughly dry. Use a clean, lint-free cloth or a soft brush to apply the sealer evenly, following the manufacturer's guidelines regarding application and drying time. Once the sealer has dried, wipe off any excess with a clean cloth.
Preventive measures are another crucial aspect of tile maintenance. Avoid using abrasive cleaners, acidic substances, or harsh chemicals on the tile. Place doormats or rugs at entrances to prevent dirt and debris from being tracked onto the tile. Use coasters or trivets under hot or wet items to prevent heat or moisture damage. Also, avoid dragging heavy objects or furniture across the tile surface to prevent scratching.
Lastly, regular inspection of your ceramic mural tile is important to identify any signs of damage, such as cracks, chips, or loose tiles. If you discover any issues, contact a professional tile installer or repair specialist immediately to address the problem. By following these maintenance instructions and tips, you can ensure that your ceramic mural tile remains a beautiful and lasting addition to your home.
Conclusion
Ceramic tile murals are more than just decorative elements for your home. They are a unique and elegant way to express your personality, style, and aesthetic preferences. They can transform a room or wall into a work of art, providing a focal point that captivates and invites reflection. Whether it's a depiction of a memorable landscape, an abstract pattern, or a colorful mosaic, ceramic tile murals exude a sense of sophistication and artistic flair.
The installation of a ceramic tile mural, as detailed in the steps above, may seem like a daunting task. However, with careful planning and execution, you can successfully install a stunning mural that adds a dramatic touch to your home. From choosing the right design and preparing the wall to installing the tiles and adding the finishing touches, each step is integral to achieving a professional and pleasing result.
Proper installation is key to the durability and longevity of the ceramic tile murals. Therefore, investing time in preparing the wall, ensuring it is clean, level and primed, is critical. The right type of adhesive and meticulous positioning of the tiles can make a significant difference in the final outcome. Following the recommended procedures for sealing and grouting the tiles will further ensure the mural's longevity and its resistance to wear and tear.
However, the job doesn't end with installation. Maintaining your ceramic tile mural is equally important. Regular cleaning, stain removal, and sealing can protect your mural from damage and keep it looking vibrant and new. Moreover, preventative measures such as using non-abrasive cleaners, protecting the tile from excessive heat, and avoiding dragging heavy objects across it will help prevent unnecessary damage.
In conclusion, ceramic tile murals offer a unique way to enhance your home's aesthetic appeal. While the process of installing and maintaining a ceramic mural might require a bit of effort and care, the final result - a beautiful, personalized piece of art in your home - is well worth it. By following the steps outlined in this guide, you can install a stunning ceramic tile mural that not only enhances your home's interior but also reflects your personal style and taste.


